


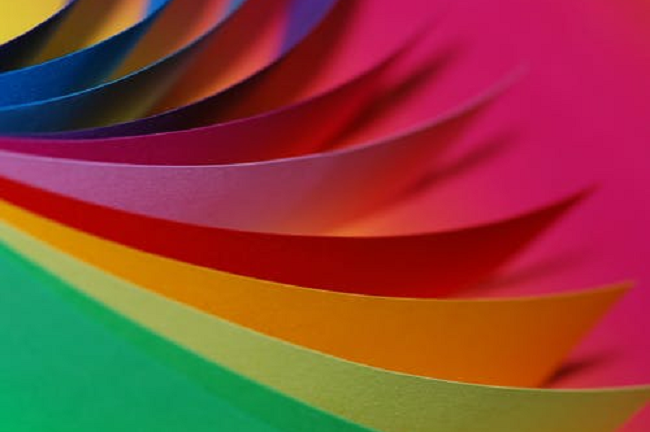
We can be very creative. We can turn our imagination into real, tangible objects. It is possible to trigger anyone’s creativity using some easy, cardstock paper objects. They can help you to express yourself while increasing your hand-eye coordination. Colorful cardstock paper is useful for this objective. Here are 6 fun objects which anyone can make with cardstock paper.
1.Zoo animals

You can make some colorful, realistic zoo animals with cardstock paper today. To create them, you need some animal templates, craft paint, cardstock paper, white glue and pipe cleaners.
Begin by printing out the animal templates. This can be done with cardstock printers. Cut out the templates. Proceed to paint them and let the paint dry.
After it is completely dry, cut some tails, tusks or snouts from the pipe-cleaner. Color them accordingly. Use the white glue to secure the tails, tusks and snouts to the cardboard animals. Make sure to follow the example of the templates. Proceed to cut slits in the cardstock animals and put some legs on them. Set the animals upright so that they stand up. Have fun!
2.Chinese New Year Dragon

On February 16th, the Chinese New Year is celebrated. You can use cardstock paper to join in the festivities. You will need a regular balloon, a paper cup of 9 Oz and cardstock measuring 2×12 inches. You also need clear tape, confetti, hot glue and craft glue.
Begin by tying a knot on the balloon’s neck. Cut off the upper part. Take the cup and cut out its bottom. Stretch the opening of the balloon and tape it over the cut edge of the cup. Set this part aside.
Take the cardstock and cut a circle with a 10 inch diameter on it. Trim the edges and draw a dragon on it. Use the upper part of the paper cup so as to make a mouth. Proceed to add details by gluing on some paper eyes, nostrils, horns and more.
Turn the paper dragon over and hot glue the upper section of the paper cup to the back of the mouth. Fill this section with confetti. Pull the knotted end of the balloon and watch the dragon spit confetti fire!
3.Make paper glass

You can transform coffee filters into paper glass. This project will need some coffee filters, different-colored non-permanent markers, spray starch, yogurt container and scissors.
Pick up a coffee filter and trim its edge so as to create an organic, uneven shape. Proceed to make some lines, blobs and spots using non-permanent markers. After that, drape the colored coffee filters over an upside down yogurt container.
Apply spray starch on the filter until the colors start to bleed into each other. Make sure that the coffee filter is utterly wet. Leave it to dry. The translucency of the coffee filters will create an illusion of glass.
4.Tube Town

You can make cute cottages using cardstock tubes. This project will require cardstock tubes, colored cardstock, scissors, tacky glue and a glue stick. You’ll also need some paint, permanent markers and colored pencils.
Begin by painting the tubes in different colors. Leave them to dry. After they’re ready, use the scissors to make some angled cuts on one end of each tube. Ensure that the tube makes a point after the cuts.
Cut a 3×3 inch piece of cardstock paper. Proceed to color it and draw some bricks on it. After it is ready, fold it in half and secure it on the pointed end of the tube. Use tacky glue for this purpose.
At the lower end of the tube, use the scissors to make 2 cuts. They should create a rectangular door. You can glue on a bead to make the doorknob.
Get some colored cardstock and draw windows on it. Cut them out of the paper and glue them upon the tube houses using the glue stick.
Pick up some cardstock and fold into an open ended cube. Stick it to the roof so as to make a chimney.
5.Cone heads

Cardstock paper can be used to create some cute cone heads. To make them, you will need some scissors, glue dots, tacky glue and a marker.
Pick up some colored cardstock and draw a circle. It should be 4 to 7 inches in diameter. Use the scissors to cut it out. Also, cut a slice of paper from the circle. Roll the rest of the circle into a cone. Proceed to secure it together using some glue dots.
Pick up the card stock and draw some ears. Proceed to cut them out. Stick these ears to the cone using tacky glue. Add some white eyes and a pom pom to the pointy end such that it resembles a nose. Proceed to draw whiskers, eyebrows and other details using the marker. Hang or tack the cone heads on the wall.
6.Bunny hat

You can make a bunny hat using cardstock paper. You will need scissors and tacky glue. Simply trace two circles on a piece of colored cardstock paper. One circle should be an inch inside the other.
Use scissors to cut out the circles. After that, proceed to cut out the inner circle too. Draw some 4 inch bunny ears on the colored paper. Proceed to cut them out.
After that, use tacky glue to stick them to one side of the cutout paper. They should be 3 inches apart. Fold them up such that they stand vertically. Voila! The bunny hat is complete.
Cardstock paper is highly versatile. It can be used to make a wide range of crafts. Above are 6 items that you can make with this paper. They are easy to complete on your own. Many of them are great decorations for parties and events!