


Click lock flooring comes in several different varieties; luxury vinyl, laminate, or wood. It’s similar to tongue and groove wood flooring, but can be much easier and quicker to install. Some types are water proof; others do well in high-trafficked areas, especially with kids or pets.
Make sure you do your research before you choose the type and style you want. In some cases the flooring may be thicker, and this could have an effect on aspects of your room such as baseboard or counter layout. You should go into your hardware store of choice with measurements, so that you know exactly how much of the product you’ll need and how it’ll fit into your home.
Many stores have free samples that you can take home to get an idea of texture and color. Different styles include faux tile, wood, bamboo, and the very popular recycled barn wood option for a rustic look. Places like Home Depot sell the flooring by piece or in packs priced by square foot.
Preparing the Sub-floor

Make sure the surface you’ll be installing on has been properly prepared. Any previous flooring should be removed, and the base cleaned well. If the floor is uneven you have options for leveling it properly. These include air gap underlayment, cork, polyethylene and concrete.
Necessary Tools
The basic tools needed for any click lock installation are a hammer, flooring nails, a tapping block, chop saw, and spacers.
The spacers are used to make sure the flooring is properly spaced where it comes up against counters and walls.
Each piece of flooring has a grooved edge and a sister edge that will fit into that groove. A tapping block is needed so that when the grooves are fit together, you can knock them even tighter for a firm fit. Using a tapping block will ensure that no dents or marks are left on the flooring. Some types, like laminate and vinyl, bruise easily.
You’ll need a chop saw to cut end pieces when you reach the edge of a wall or any protruding sections of the area, such as cabinets or counters. If you don’t have a chop saw available there are many companies that have tool rentals as an option for homeowners who don’t feel like investing in an items they might only use once or twice. Do a bit of shopping around to find the best prices and tool quality for the job you need done.
Side note: if you’re installing large areas of flooring, look into renting a truck to move the materials. Prices are almost always reasonable and your vehicle won’t have to take the weight of all of that product!
Installation

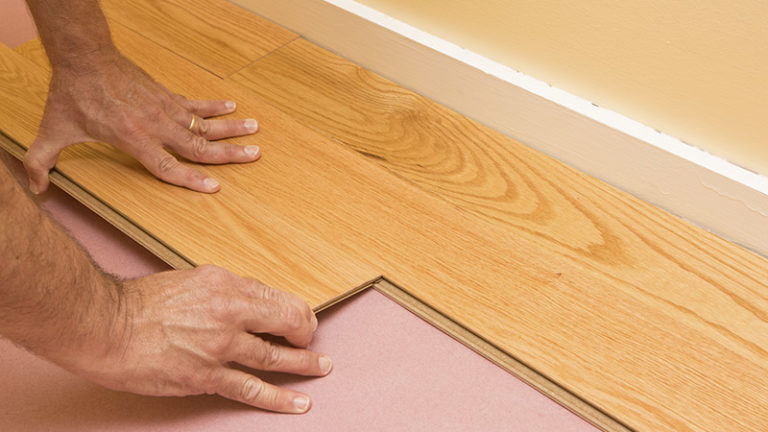
Lay the first piece with the grooved side out; nail the top corners of this piece when you’re sure it’s level and straight. This is an important step as the rest of the floor will depend on how you lay this one piece!
Take your time. Most mistakes made when installing flooring are the product of getting over confident and trying to move quickly. The great thing about click lock flooring is that it does go down fast – much faster than wood flooring that can be extremely time consuming.
Finish one row, and then lay out several pieces to see if the pattern made by the floor and texture are satisfactory. It helps to take a few steps back. In most cases you won’t want to make the edges of the new row match that of the last; off-setting these edges will create a more appealing, natural look, especially when it comes to faux-wood textures.
Whenever you click in a section, use the tapping block and hammer on the outer edge and the base to make sure the piece fits in firmly. You should be able to see any obvious spaces or gaps. Have a small brush nearby to clean up edges and get an even tighter fit.
If you reach the edge of a wall or cabinet and need to cut a piece to size, make sure you’re measuring more than once to get an accurate length and cut. There is no need to nail down any other pieces – as long as they’re tapped in securely, the floor will hold itself together.
When you get the final piece in you will want to nail the corner, just as you did the first piece. This completes the flooring! You can re-install baseboard and clean up at this point. Take a step back and admire your work. You’ve just successfully installed your own flooring, from start to finish.
Hopefully this process has been easy to understand and is motivational when it comes to DIY home projects. If you take your time, do your research, and choose the right materials and styles for your home, the end product is bound to be successful and satisfactory.