


Nothing can be more tragic than your favorite dinner table being chipped at the sides during shifting to your new house or the neighbor’s kid breaking your rocking chair.
Furniture is essential for any house. It not only adds to the beauty of the house but is also necessary for daily life. Wooden furniture especially is one which never goes out of style.
It adds a classy look to any house and goes well with almost any interior design. Therefore, keeping it in top condition is a priority for any owner. So here are a few simple repair solutions to your furniture woes.
Causes of Damage
A number of factors make wooden furniture susceptible to damage.

Lack of attention
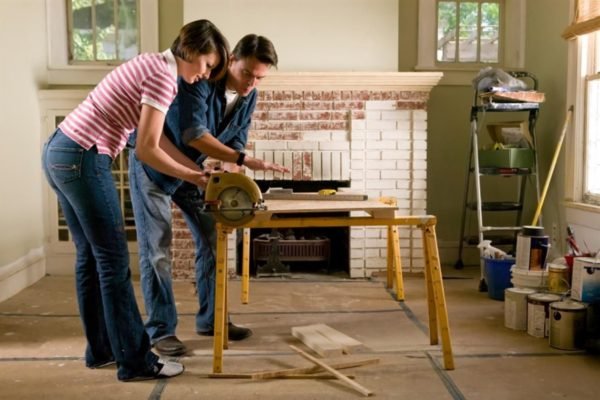
This is a major cause of damage. Usually moving furniture results in scratches or broken corners. Therefore, it is important to plan out the route that you will move your furniture through and take measures beforehand.
If possible, detach the furniture and move it by its strongest and most stable part. The best solution to protecting furniture is the prevention of damage.
Environment
Extremes of temperature and humidity can cause wooden furniture to lose its luster. You should also ensure that it is not under direct sunlight or rain.
Insect and Rodent Infestation
Termites, carpenter bees, and ants are the culprits that can infest wood. Any sign of a change in the color of wood or wood dust near an opening is your signal for starting fumigation.
Rodents don’t eat wood but rather chew through it to get to the food. So it is better to keep food away from wooden furniture so that rodents are not attracted by the scent.
Mold, Mildew, & Fungi
Humidity and high-temperature favor mold growth. Try to keep furniture in a temperature-controlled room to prevent this. Remember to check regularly so that any growth can be detected early on.
Products to Help with Repair
You don’t need an expensive toolkit; a few essentials will go a long way in helping you for simple repairs.

Glue
This is the most important component as it will hold your furniture together. Invest in a good quality glue, and ensure there are no gaps while joining the parts together.
To glue things properly, apply glue, then join the ends and place transparent tape on the top. Then remove the tape once the ends stick.
Resin
Resin is a natural method employed by trees to repair them. Simply fill the cracks with resin and smooth the surface with a paddy knife. Give some time for the resin to settle and then remove any excess resin.
This is very effective for small cracks.
Clamp
Invest in clean clamps specific for fine works. The clamps should be lightweight, give appropriate pressure, and should not damage your furniture while tightening.
24oz. Dead Blow Mallet
Look for those with sand or lead shot in the head to help direct the blows.
Medical syringe
This allows you to apply hot water directly into a joint in small amounts at a time.
Fine Rasp or Sandpaper
This will help you remove glue residues inside mortises or tenons (joint parts in most chairs, tables, etc.) before reapplying glue to make assembly easier.
Common Repairs
It is not possible to cover every type of repair, but the most common repairs will help you get started and give a gist of how to get about repairing.

Loose Chairs
This is the most common furniture problem that you will need repair for. The pressure of bearing our weight and all the sudden plopping down on chairs put a lot of stress on them.
If only one joint is loose, then drill a 1/16” hole right under the joint into the mortise, then push diluted glue via a syringe until the glue seeps out the mortise up to the tenon. Then clamp overnight.
For multiple joints, it is best to disassemble and reglue. Check and remove any nails in the joints before disassembly. Then label all joints so that you know the corresponding mortises and tenons.
You can use spreaders or a mallet to separate the joints. Alternatively, you can also use plunge warm water from a syringe to loosen the glue in the joints.
Remove excess glue with sandpaper but don’t remove any wood as that would make the joints lose during reglue. Now apply glue and reassemble all parts and clamp them together on a flat surface.
Be careful not to give too much pressure as that might deform the furniture.
Broken Corners
This is a common issue faced while moving furniture. First, clamp a small board beneath the repair area to support the resin. Then mix the resin with catalyst and quickly apply over the broken area to form a thick edge that can be shaped later before the resin hardens.
After the resin has set, cut away excess resin with a utility knife and then shape with a microblade. Apply acrylic color to match the wood and then mask off the repair with newspaper before coating the resin with lacquer.
Stuck Drawers
Prolonged usage causes friction and eventually causes drawers to get stuck. Try flipping the runners and apply glue to fix them back into place. You can also try rubbing a candle or a scented soap bar for an aromatic dresser.
If the drawers are stuck due to swelling by humidity, then find out where they are getting stuck and plane those down. This is time-consuming, so you have to be patient and make adjustments accordingly after planing them down.
Extra Holes
We often miscalculate the distance and drill an extra hole or a hole in the wrong position. In such cases, mix wood glue and sawdust to create a thick paste and fill in the hole. Then level the sand after it has dried.
Non-aligned hinges
Hinge alignment can be a bit of a nightmare. Use steel screws until you get the perfect alignment for the hinge cabinets then replace with brass screws during final installation.
Nail It
We all fear driving the nail into our hands instead of the wood. But carpenters swear by this simple trick. Poke the nail through a piece of duct tape to stabilize the nail until the nail is steady.
Then remove the tape and drive the nail completely. For nailing the edge of the wood, blunt the pointed end with a hammer; the flatter tip will not split the wood now.
Other Quick Fixes
If screws can’t keep your drawer knobs in place, push and break toothpicks in and then tighten the screws.
For stripped screws, jab a cloth dipped in glue in the hole with an awl to one side and then reinstall the screw when the glue dries up.
Conclusion
Before you get the drill and glue ready, ensure that you know that the repair is within your scope. Seek professional help if required. It is necessary that you know what you are doing if you intend to replace parts or do invasive repairs.
You should also realize which furniture can be repaired and which ones need farewell. A successful repair is usually possible with the right set of tools and good skills.
Happy repairing!