


Crafts can be a great way to spend a rainy afternoon, and to flex your artistic muscles. Not only is it a lot of fun, but it has also been linked to mental health benefits. Here are just a few enjoyable and simple crafts you and your family can try.
Homemade Cards

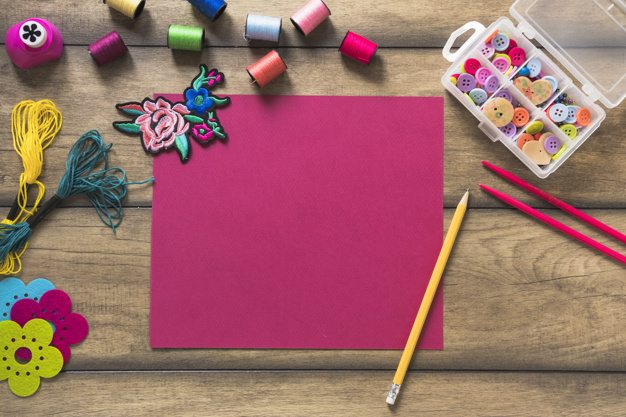
If you’re someone who regularly sends out greeting cards, making some yourself can be a great way to indulge your creative side, while saving a bit of money at the same time. They are also a good craft to try out if you’re just getting into them, because simple cards are fairly straightforward to make. To get started, all you’ll need is some good quality card, some drawing utensils, and a decent pair of scissors. You may also want to experiment with some different coloured card, to see what different effects you can accomplish. If you’re a little lacking in confidence as far as drawing is concerned, you can even use some stencils at first for a little extra help. Another great thing about card making is that while the skill level required to start is low, there’s plenty you can do to develop more elaborate and intricate cards once you have started to get the hang of it. This can include using different materials for stand out borders and embellishments, or investing in a die cutting machine for smoother and more accurate card cutting. For a fantastic cardmaking resource click here.
Tie-dye

The first thing many people tend to think of when they hear the term “tie-dye” is hippies and the 1960s. And there’s certainly nothing wrong with that! However, it does overlook the fact that tie-dying has surprisingly grown in popularity again as of late. Doing so can also be a fun way to spend an afternoon. You can also get surprisingly diverse results with an array of differently coloured dyes and fabrics. It’s not just t-shirts you can customise with tie-dye, either. Hats, bags, blankets, and even tea towels can be personalised easily and artistically. All you’ll need to get going is a dye or dyes in the colour of your choosing, the material you want to dye, and some rubber bands. Place the rubber bands around your piece of material in the pattern you want to apply to the material. This will cause the dye to run in the directions that you want it to. Once you have mixed your dye with warm water and soaked your material, it is ready for dyeing.
While tie-dying is completely safe, doing so can be a messy process. You should therefore always wear gloves while applying the dye, and if you’re letting your child make this craft, make sure they do so under direct supervision. Always read the instructions included with the dye, too, so you can ensure that you are using it safely and correctly. Once you have left the dye to set on your material, rinse out any of the dye from it. You can tell when all the excess dye is removed once the water you’re rinsing out from your clothes is fully clear. Then, you should run it through the washing machine on a cold water setting. Don’t put it in the wash with any other items, though, unless you want the whole of your wardrobe to be tie-dye!
Macrame Plant Holder

The best and most fun crafts to make are ones which double as something you will get a genuine use out of. In this respect, macrame plant holders are an absolute winner as far as crafts go. They are not only practical and fun to make either. The different knots and colour fabrics you can use are a great way to subtly add a personal touch to your home, as well as some much-needed warmth. Macrame has been a popular way of decorating homes for decades now, and involves the creation of decorative objects out of ropes and knots. This type of craft might take a bit of learning if you’ve not done it before, so you might want to look up some specific tutorials on macrame before getting stuck in. This will give you a basic idea of the types of materials as well as the major knots you’ll need to know for crafting basic macrame items. The specific knots you’ll need for this plant holder are a wrap knot and an overhand knot. Fortunately, these are both fairly simple kinds of knot, so it’s likely you’ll get the “hang” of it in no time!
Once you’ve familiarised with the knots you’ll need for the plant holder, you can get started. All you’ll need for this craft is some rope, a pair of scissors, and something to thread your rope through, as well as a plant pot. Curtain rings are commonly used because they are readily available. First, cut two pieces of rope, around 70-80cm in length. These ropes will go around the rest of the lengths of rope you cut to form the base Then, you need to work out how long your plant holder is going to be. Cut four more lengths of rope around twice the length. They need to be double the length because these pieces of rope will be what the plant pot hangs from. Once you have done this, use a wrap knot to tie one of the first pieces of rope you cut around one end of the four pieces you have just cut, and thread it through the item you chose. It’s a good idea to use something which holds the ropes in place so that tying the knots is easier. Once you have done this it’s time to use overhand knots to tie the four pieces of rope together in pairs. You should do this continuously until each pair of lengths of rope is fully threaded together. This is the tricky part, so you might want to look for a specific guide or video on this technique. Finally, tie a wrap knot around the other end of the pieces of rope. This will create the base for your plant pot to sit in.


